Tuesday, December 28, 2010

¡Patacones!


Patacones are what we call them in Panama.  In some places (Puerto Rico for example) they call them tostones.  
Nothing brings back memories like a good plate of patacones.
Yummy grilled chicken and patacones on the beach... 
I remember saving my money to ride my bike to the KC (Knights of Columbus) in Margarita to get a hamburger and patacones.  Later I found their sancocho was the bomb and had that and patacones instead.  

We have always had problems in Arkansas finding good green platanos (plantains.)  Usually the stores have them, but they are maduros (ripe) and I despise ripe plantains.  (I know, most people love them.)  When mom moved to Puerto Rico she discovered the island secret of using green bananas, which are much cheaper in PR (and Arkansas.)  So, now I use green bananas if I can't find good platanos.  They really taste almost the same if they are very green although maybe a little silkier in texture.  They are easier to peel and cheaper. 

Patacones

  • Peel plantains or green bananas.  You have to do this quickly and right before frying or they turn black.  Be careful as they will also turn your fingers black if you don't wash right away! 

Score on several sides and peel skin off

Cut into thumb sized pieces

Fry one time and drain

Put between waxed paper or brown paper and squash!

Fry again til golden

Drain and salt!

    Wednesday, November 10, 2010

    Chicha de Saril

    This is one of those recipes that takes me back to my childhood...
    Here is my recipe using dried flowers (because, I am in Arkansas and can't get fresh ones!)

    Saril, is the calyx of the hibiscus flower.  You can find dried ones at most Mexican or Latin American grocery stores.  In Mexico they are called "Jamaica" flowers because the drink originates from Jamaica.  (Well, technically it comes from tropical Africa...)

    When it's boiled you get a lovely deep red drink (similar to a Kool Aid punch) which actually is very good for you.  As a kid, I was told by my baby-sitters that it was good for your liver and iron and would keep you from getting colds.  Unlike other concoctions I didn't mind drinking this because it was very, very, yummy. 

    The truth?

    Hibiscus tea, Chica de Saril, Jamaica, Sorrell Punch, Hibiscus punch... whatever you call it
    HAS BEEN SHOWN to:
    Lower cholesterol,
    Lower blood pressure,
    Help sugar levels,
    Boost immune system
    and aid in weight loss!

    *Now, with all the sugar in it I'm not sure how much of a help it can be in lowering blood sugar...


    Friday, September 24, 2010

    Tub Scrub & Laundry Detergent

    Rub-a-Dub Tub Scrub 
    (or "Because I have 3 men in my tub scrub"?)

    1. In a mixing bowl pour about equal amounts of baking soda and Borax.  (What I do is take 2 jars, fill one almost full of Borax and the other almost full of baking soda.  Then I pour them both into a bowl.)
    2. Pour in some True Lemon powder (you can use True Orange or Lime also, or citric acid if you can get it) just enough to scent the mix, about 2-4 Tablespoons more or less.
    3. Mix and put back in your jars! 
     To use:  Wet bathtub or sink.  Sprinkle tub scrub in tub.  Watch the fun!  It bubbles when it gets wet!
    Scrub and watch the sparkles!  This smells yummy too.

    Liquid Laundry Detergent
    1 cup Washing Soda (you can get this at most grocery stores now)
    1/2 cup Borax
    7-10 drops of tea tree oil (disinfectant and antibacterial)
    *You can add other essential oil drops if you want a scent but I don't
    1/4 cup or so of Dr. Bronner's Baby Castile liquid soap
    4 quarts hot water (first) then added about 8 more quarts
    Mix it in a bowl with a whisk because the washing soda (soda ash) gets hot when it gets wet. (Luckily I knew this from my pool or I'd have probably burned my hands trying to get the clumps out.) Let sit for about 20 minutes to cool off, then put in containers.  I use old detergent bottles and glass bottles.
    Very inexpensive and effective!

    Granola Goodness (again)

    Can you tell I love homemade granola?  I am always trying to make the perfect batch.  And this last one has come extremely close if not made the grade.  What did I do differently?  Well, I took my recipe and then looked at my friend Alison's from this cookbook and sort of did this:

    I used my granola recipe (which basically is cleaning out my baking cabinet because I use up any nuts and fruit etc. that needs to be used.)


    6 cups of oats or more (I use what's on sale, but Bob's Red Mill are my faves)
    1 cup coconut (today I used a whole bag of unsweetened)
    2 cups wheat germ (sometimes I do flax seeds ground up or half and half)
    1 cup sliced almonds or walnuts
    1 cup chopped pecans
    1 package of sunflower seeds (I used about 1 1/2 or 2 cups)
    1 cup of baby oats or wheat flour
    1 cup dried fruit (more or less to taste, I'm allergic to almost all fruit so I used dates)
     
    This is where things got different...
    Normally I microwave or cook my liquids to a syrup to melt the butter etc.  Today I did this:
    1/2 stick of butter, melted
    3/4 cup of molasses (I like dark or blackstrap)
    1/2 cup of honey
    1/4 cup of agave syrup (or a little less depending on how sweet you want it)
    Mix the dry ingredients (except for fruit) in a bowl and wait.  Mix liquids in a bowl and pour over dry ingredients, adding a little at a time until it looks fairly wet.  Mix well and put in greased or parchment lined cookie sheets.  I actually use my turkey pan because it's deeper and things don't fly out when I stir.
    In another small bowl take some oats and flour and a little brown sugar- to equal about 2 cups.  Melt about 2 T of butter and pour over this mixture and add some of the syrup from above if any remains, if not add some honey and water to make a cookie dough consistency.  I pat this in a small greased pan.  

    Bake both at 350, checking every 5 minutes to stir, until lightly browned. (About 20 minutes or so total.) Just depends on how brown you like it. (I like my crispy to stand up in the milk!)  Take the mix that was patted in the pan and flip out onto a cutting board.  Break it up into chunks.  (Adds crispy bits to the cereal!)

    Store in the oatmeal containers!
    *I'd love your input on granola. Here is a post to my friend's recipe. She is a fantastic cook!
     

    Tuesday, August 31, 2010

    Empanadas

    Empanadas are about the best comfort food around.  I grew up eating these yummy pastries from bakeries and carts downtown.  Every country has their version of a meat pie, and I believe most Latin American ones are along these same lines.  For my wedding my family and I made 100's of these little dears and I can't eat one now without thinking about it! 
    This particular recipe is from a military cookbook from Panama, made by the wives of the Intelligence division on the Atlantic side called "Cooking With Intelligence" (long, long, ago.) BUT, it says it's taken from the "Interamerican Women's Club Cookbook"- a club my grandma used to belong to in Panama.  My mom uses this one and doubles it.   I must say it's much better than the one I used to use...

    Empanadas

    Dough:
    2 1/2 cups of flour
    1 tsp. salt
    1/2 cup of chilled butter
    1/4 cup of chilled Crisco
    1 to 3 Tablespoons of water


    Sift flour and salt into a mixing bowl and cut in the chilled shortening and butter until it resembles a coarse cornmeal, using two knives or a pastry cutter.  Add a little water until pastry is moist enough to stick together in a ball.  Put dough in refrigerator for an hour.  Roll out dough on lightly floured board to about 1/8" and cut with round cookie cutter or glass.  On each round of dough put a little of the filling, about 1/2 teaspoon.  Fold over and flute edges with fork.  Brush tops with beaten egg.  Bake in oven 400 degrees until golden brown.  Makes about 60 empanadas.

    Filling:
    3/4  lb. ground pork (my mom used ground chicken and turkey)
    1 medium onion, chopped
    1 sweet pepper, chopped
    1/4 cup of currants
    1 Tablespoon of capers
    10 stuffed olives, chopped
    1 hard boiled egg, chopped (I've never added this before, and mom doesn't either)
    1 bay leaf
    2 cloves of garlic, chopped
    1 lg. ripe tomato chopped (mom used a can of diced tomatoes)
    4 Tablespoons of olive oil
    1/2 tsp of oregano
    1/2 hot pepper (optional)
    1 sprig of parsley, chopped

    *Put oil in frying pan and fry meat a little.  Add ingredients and simmer for half an hour.  Salt and pepper to taste.

    I'll try and make some soon and post pictures for you!

    Tuesday, August 24, 2010

    Sopa de Limón

    This is my quickie version of Sopa de Limón, a yummy chicken soup from the Yucatan peninsula.  We had some in Cobá, Mexico while watching Mexico play in the World Cup a few years ago.   An awesome family memory and a feel-good kind of soup for what ails ya...
    Us in Cobá

    Sopa de Limón
    1. Saute half an onion (chopped) and some garlic cloves til transparent.  Throw in some chicken (any parts or amount you want,) salt, pepper and I like a packet of Sazón by Goya to add flavor.   Add water to cover chicken by about 2 inches.  Add 1 lime that has been cut in two.  Boil until chicken is cooked.   *I had leftover broth and chicken from when I made the enchiladas which I froze and brought out for this purpose. 
    2. Let cool til you can chop or shred the chicken.  Put chicken back in broth and add more water and a few bouillon cubes if you need more broth (I like Knorr vegetable cubes but they are becoming increasingly harder to find here.)  I also added some chopped cilantro.   Add whatever else you want to now.  (I put in some cooked brown rice that I had leftover in the fridge and some chopped zucchini.)   Let simmer until you are ready to eat. 
    3. On serving I like to put things in little ramekins to add as people like. A bowl of halved or quartered limes, chopped cilantro, black beans, pico de gallo...

    I served it with some homemade quick bread I made using my pizza recipe (1 1/2 times the recipe) plus added a bit more yeast and some fresh oregano. 

    Monday, August 23, 2010

    Enchiladas Verdes

    Do you have one of those dishes that people ask you to make? 
    (They may not be your personal favorites, but everyone else loves them?)
    Mine are my enchiladas verdes, pizza, and carrot cake. 
    This recipe came from one from my grandma that I changed quite a bit.  I do still like hers, and that's the one folks actually expect, but this one is healthier and actually more of a real enchilada.  My kids have become pickier (is that even possible?) so I took the rice out of these (which is inside them with Meme's recipe and also has almonds, which I leave out now for kids.)

    Enchiladas Verdes


    Filling:
    • Shredded Chicken (could use turkey) I boiled, cooled, and shredded breasts, about 3?
    • Chopped onions or leeks (I used leeks this time)
    • Packet of Sazon for flavoring (or you could just use salt, pepper, cumin, oregano)
    • A bit of vinegar (maybe a tablespoon?)
    • Broth if needed 
    • My grandma added cooked rice and chopped roasted almonds to her filling which is tasty for a more casserole type meal.
    Saute onions and garlic first til transparent.  Then add rest and simmer.  
    When sauce (below) is done add a little to the filling and stir.


    Sauce:
    • Sour cream, Greek Yogurt, or blended Cottage Cheese (I used sour cream and blended cottage cheese this time) about 2 cups, maybe a bit more depending on how creamy you like it.  *My grandma's recipe uses cream of chicken soup instead.
    • Shredded cheese (Mexican cheeses, cheddar or a mix) I used a Mexican/Cheddar blend from the store.  About a cup or so.
    • Salsa Verde also known as Tomatillo Salsa. (I use a pre-made salsa, Herdez brand which I like. You could make your own but tomatillos are expensive here and I haven't braved growing them myself.)  Again, as much as you'd like- think I use about a third to half of a jar.
    • Broth (I used chicken broth I'd made when I boiled the chicken breasts by adding some veggies to the boiling water.) Add enough to give it the right consistency, about a cup or so?

    Filling Enchiladas

    Rolled Enchiladas
    Spread a little sauce in bottom of 9 x 13" baking dish.  Fill flour tortillas with enough filling to still be able to roll nicely.  You can use store-bought tortillas or make your own.  Roll and place seam side down in baking dish. You can sprinkle the top with more cheese if you want to.

    Before Baking
    Bake in a 350 degree oven until they are a little brown on top and heated through.

    Wednesday, August 4, 2010

    Antique Recipe Help

    My aunt found this recipe on an old envelope when she was cleaning up my grandparent's attic:

    It is in my grandma's handwriting, and written when her sister was still alive (before 1980 or so.)  I'm thinking it was even written in the 50's, but not sure. 

    12 eggs (this quantity was blurred so not sure) 
    1 T salt
    4 T mustard
    2 c sugar
    2 c vinegar
    1 cup cream or canned milk
    Cook til thick.
    *Notes- Real Good


    We can't figure out what the recipe is for!  I haven't tried to make it yet (because honestly, it doesn't sound so yummy to me) but do really want to know what it's for! My grandma and her sister were both Canadian, in case any Canadians out there know what this is!

    It almost sounds like a cooked mayonnaise, but then also like a custard like lunch salad.  Hmmmm...
    Does anyone have any ideas?

    Tuesday, July 27, 2010

    Millions of Peaches (Peaches for me)

    We have been enjoying summer's bounty in the form of beautiful peaches from Clarksville.
    We picked quite a bit week before last, then mom brought me some more this weekend.  YUM!
    Nothing is better than fruit off the tree.  I still can't eat bananas or peaches from the store.  Not the same!  I made my sweet mom-in-law's peach pie recipe twice with them.  Once for us (sorry to say we ate it before I took a picture) and once for the awesome staff at school (still, no picture.)  It is a super easy pie and so tasty!  Normally I make jam, but since I still have some from 2 yrs ago that I probably should throw out I'm thinking "Hey, my family doesn't really eat jam."  Maybe I'll can a jar or two.

    Peach Custard Pie
    2 cups of sliced or chopped peaches (peeled of course!)
    1 cup sugar (I use raw sugar)
    1 1/2 Tablespoons of flour
    2 eggs
    2 Tablespoons of butter
    vanilla or almond extract (to your liking)

    Fill an unbaked pie crust with peaches.  *I use the two cups, then add more to fill up the crust after the rest has been added. 
    Mix sugar, flour, beaten eggs, melted butter and vanilla and mix 'til it looks nice and yellow.  I like to add a little cinnamon too.
    Pour in crust over peaches and add more peaches if you want to!
    Bake until done!

    I made Peach Ice Cream last night and it is delicious.
    I sort of made it up from about 3 recipes.  Think this is what I ended up with:

    Peach Ice Cream
    1 pt of cream
    6 cups of milk
    3 cups of sugar (I didn't have 3 so it was like 2 1/2 of raw sugar)
    vanilla
    6 eggs
    10 peaches

    I put the peach slices I'd cut up earlier in the blender.  Think I had about 6 cups, maybe less.  Mix til smooth (less if you like chunky.)
    Add eggs and sugar and blend
    In large pan heat heat rest of ingredients over med. low heat until warm.
    Add peach/egg mixture to this and mix.
    Cook til fairly warm.
    Put in ice cream maker and mix according to directions.  (Mine is small and didn't make all this.  I need to make it MUCH smaller next time, but guess we will have some tonight too!)

    Entering this in Alicia's Tasty Tuesdays, per request!  Come join in the fun!

    Sunday, June 20, 2010

    Summer Toma-Yums

    Made my honey this for lunch by the pool.  Fresh tomatoes from the farmer's market (only my cherry tomatoes are ripe thus far) with asiago cheese, balsamic vinegar dressing and lemon basil!

    Promises of Caprese's to come!

    Tuesday, June 15, 2010

    Manicotti Mania!

    I went a little crazy with the manicotti yesterday.  I made two huge pans- one cheese and one turkey & cheese.   Luckily I had enough to have some wonderful friends over today for lunch and swimming!
    Manicotti

    2 pkgs of manicotti noodles (cook until ALMOST done, drain and cool)
    1 large container of ricotta cheese
    1 lb. of ground turkey
    1/2 onion chopped finely
    herbs to taste (I used fresh oregano, nutmeg, and basil)
    Mozzarella cheese (grated)
    Any other cheese that you would like to get out of your fridge (I used goat cheese and some provelone also)
    Tomato sauce of your choice (or homemade)
    1. Cook onion in skillet, when glazy add ground turkey (or beef or sausage) and basil and oregano.  Add red wine if you have some (I didn't and used some balsamic vinegar.) Brown and set aside.
    2. While meat is browning mix ricotta cheese, egg, nutmeg, and other cheeses (saving some mozzarella for top.  This will be your filling if you want cheese only.  If you want to add the meat mix it to this cheese mixture when it's browned. 
    3. In a large casserole dish pour some tomato sauce to cover bottom of pan.  
    4. Take one manicotti noodle in your hand and stuff with cheese or cheese/meat mixture.  (I use a large icing bag without the tip to fill mine.)  Lay in pan.
    5. Continue to fill until they are all filled and lay in pan.  
    6. Cover with a little tomato sauce and then top with mozzarella cheese.
    7. Bake at about 350 degrees until melty and bubbly! 

    Thursday, June 3, 2010

    Flim, Flam, Flan

    My daughter had a Spanish final project to do and decided to do a presentation on flan.
    She did the project by researching the history of flan (which was very interesting believe it or not) and then making a traditional flan and making a power point presentation on it all.  I think she did a great job.
    Her finished project (not quite cooled so it looks a little lumpy)

    Here is the recipe she used from Cocine A Gusto, a great cookbook I picked up when mom lived in Puerto Rico.  It's published by the University of Puerto Rico, but is actually a really old cookbook originally- I think the first publishing date is in the 1950's.  (That made for interesting Spanish cooking terms.)

    The recipe: (translated for your pleasure)

    Flan
    6 eggs
    3/4 cup of sugar
    3 cups milk
    1/2 teaspoons of salt
    1/2 teaspoon of vanilla (we used 2)
    For the Caramel-
    1 cup sugar
    2 tablespoons of water

    Beat the eggs enough to mix the yolks and whites.  Add the rest of the ingredients and stir.  Prepare the caramel and pour a little in the bottom of each of the molds or ramekins.  Fill the molds and place in a pan with some hot water (water bath or bain marie.)  Cook in the oven (not preheated) at about 350 for one hour.
    Makes 8 flans.
     Making the caramel (cook the sugar in a pan stir until it browns and bubbles)
    Filling the Ramekins

    Tuesday, June 1, 2010

    Chocolate Cream Pie for What Ails Ya

    My little guy wanted chocolate pie for lunch, and of course I wouldn't buy him a piece.  To console him (yeah, he gets worked up over food like his mama) I promised we'd make a chocolate pie together for dessert tonight and he could be the taste-tester.   (It worked.)


    I'd made apple pie last week for a neighbor and made extra crusts and froze them so we had a crust ready.
    We baked the crust- I failed to put beans or such in to keep it from rising so it shrank and puffed a bit, but oh well. 
    Then he helped me make Chocolate Pudding for the filling. 


    Chocolate Cream Pie

    Filling
    3/4 c sugar
    1/4 c cornstarch
    3 c milk (I use whole organic)
    4 ozs of unsweetened dark chocolate, chopped up (I used Ghiardelli)
    4 egg yolks, beaten lightly
    2 Tablespoons butter
    2 teaspoons (good) vanilla

    In saucepan on medium high heat whisk together first ingredients quickly. 
    Add chocolate. 
    Stir and cook until it boils and thickens.  Then once this happens boil 2 minutes more and then remove one cup of to the bowl with the beaten egg yolks.  Mix with a whisk or fork and add back to the saucepan with the rest.   Boil 2 more minutes, add butter and vanilla, and take off heat.  Pour into buttered ramekins or dishes (or in this case put in fridge to cool.)

    The messy pan after we filled the pie (lots left! Yum!)

    While this cooled I made my whipped cream (1 pint of cream, some powdered sugar, some vanilla)

    When the pudding is cooled off spoon into the cooled pie crust, then top with the whipped cream and chocolate shavings if you desire!  YUM!

    Saturday, May 8, 2010

    Chicha de Arroz con Piña

    My Abuelita and Fidelia Hernandez (Panamá)

    Chicas are homemade drinks in Panama.  In Mexico they call them "aguas frescas" I think, every country has their own versions and names for these yummy beverages. 
    Arroz con piña is my favorite.  It is a frothy, yummy, sweet, drink that instantly brings back memories of shopping on Avenida Central with my mom and Meme (mi abuelita.)  They would have big jugs of this for sale in little stores and it tasted so good when you were hot and sweaty from shopping with two shopaholics all morning! I learned how to make this by watching one of our babysitters, Delia. She was a wonderful cook and an even better person!


    Recipe for Chicha de Arroz y Piña

    1. First cut top and bottom off of pineapple (piña.)

    2. Continue by cutting rind off. (Do not throw away!)

    3. Cut into quarters. Then cut down edge to get rid of center core. (SAVE.)
    4. This is what you will have. A bowl of the cut up fruit, a top piece (to plant,) and a pot with all the end pieces, core, seedy pieces etc.

    5. Cover the scraps in the pot with water. Add about 1-2 cups of rice, cinnamon to taste (or cinnamon sticks,) a little dash of cloves, sugar to taste (I like raw or turbinado about a cup,) and boil until the rinds are soft and rice is done. You can substitute the sugar with a can of condensed milk at the end if you like that taste, but I was trying to keep it lower calorie and this tastes as good. When it's done take out scraps and toss them in your compost. Put what's left in the blender and puree. Then pour into a pitcher over some ice to cool. To serve I like to get a glass of ice, pour glass about half full of milk, then the rest with the chicha.
    Sprinkle with cinnamon.
    You can add vanilla if you like and more pineapple juice if you like.
    (Also, if you didn't add sugar you can add the
    condensed milk to the pitcher and add a bit more water.)

    Thursday, April 22, 2010

    Molten Chocolate

    The kids wanted those stupid Molten Lava Cakes that they get when we go out to eat sometimes.  I told them we'd make them tonight.  So easy!
    I used Paula Deen's recipe here.  (Thank you Paula and the Food Network!)
    Talk about bad for ya! Don't think this on is on "Lose It."  I won't be able to eat anything tomorrow!


    Molten Lava Cakes 

    (Makes 6)

    Ingredients:

    • 6 (1-ounce) squares bittersweet chocolate
    • 2 (1-ounce) squares semisweet chocolate
    *I didn't have bittersweet chocolate, so I used chocolate chips and some unsweetened dark chocolate to equal 8 ounces. 
    • 10 tablespoons (1 1/4 stick) butter
    • 1/2 cup all-purpose flour
    • 1 1/2 cups confectioners' sugar
    • 3 large eggs
    • 3 egg yolks
    • 1 teaspoon vanilla extract
    • 2 tablespoons orange liqueur  (*I was out so I used good rum instead.)

    Directions:

    Preheat oven to 425 degrees F.
    Grease 6 (6-ounce) custard cups. Melt the chocolates and butter in the microwave, or in a double boiler. Add the flour and sugar to chocolate mixture. Stir in the eggs and yolks until smooth. Stir in the vanilla and orange liqueur. Divide the batter evenly among the custard cups. Place in the oven and bake for 14 minutes. The edges should be firm but the center will be runny. Run a knife around the edges to loosen and invert onto dessert plates.

    Saturday, April 17, 2010

    Beet Salad (so springy!)

    I LOVE the beet salad at Ya-Ya's, a restaurant my honey and I go occasionally,  usually sans kiddos.  The last time we were there I thought, "This has got to be the easiest salad on earth to make, why don't I ever make it?"

    So tonight:
    Beet Salad

    • Spring Mix of lettuces and arugula (whatever greens you have) 
    • Goat cheese, queso fresco, or feta (I'm using chevre) 
    • Some pickled beets (The recipe I found online used roasted beets, but I don't have any so I used the pickled.)
    • Slivered almonds (roast til light golden brown)
    • Section or slice an orange (or tangerine, or clementine...)
    • chopped green onions or sliced red onion
    For  the dressing I took:
    • Juice of one orange
    • Juice of two lemons
    • 2 Tablespoons of balsamic vinegar
    • 4 Tablespoons olive oil (more or less)
    • Salt and pepper
    • fresh parsley
    *Mix the dressing with a whisk and chill.
    I tossed the greens and almonds with some dressing (yes, I used too much- will know better next time.) Then I finished it with the beets, cheese, and oranges.
    It was almost exactly like the restaurant!  (Much cheaper!)


    Salad with Yummy Cornbread Hits the Spot on a Spring Night!

    Wednesday, February 17, 2010

    Angel Food Woes

    Okay, I'm going to admit it...

    I used to be a pastry chef at a 5 star restaurant...
    BUT, I can't make an angel food cake to save my life.
    My grandma always made us an angel food cake for our birthdays if we were near her house, smothered with lemon glaze and with a candle and fresh flowers from her yard stuck in the hole in the middle.
    ALWAYS perfect.

    I had been given the Ratio cookbook by Michael Ruhlman for my birthday from a dear friend and found that it had an angel food cake recipe in it.  He says that the secret to a good angel food cake is not overbeating  your egg whites (not into a meringue like I usually do, but to a soft peak and still pourable stage.)
    Okay, I did that perfectly.  Bought a new angel food pan at a garage sale and used it.  Fresh farm eggs.  Okay, I didn't have cake flour and used regular flour (could that be the problem?)

    I also was impatient as it was Valentine's day and the kids wanted dessert, so I only let it cool for an hour, when the recipe said one and a half hours.  (Maybe that was it?)

    ANYWAY...
    It looked lovely in the pan baking, rose up and browned perfectly.
    When I took it out and turned it over to cook it started shrinking...
    When I turned it out it broke and then flumped over to the side.  Ew.

    I also made fresh lemon curd from the Ratio cookbook which was divine, but note to self,
    don't mix an eggy cake like Angel Food with eggy lemon curd.  Too much of a good thing.
    I'm going to make a lemon tart tonight maybe.

    Does anyone have suggestions on making a great Angel Food cake?

    The recipe I used was:

    Angel Food Cake
    12 oz egg whites (9-11 egg whites)
    12 oz sugar
    4 oz cake flour
    3 fingered pinch of salt
    1/2 teaspoon cream of tartar
    1T fresh lemon juice
    1 teaspoon vanilla

    *If you want the directions let me know and I'll post them.

    Friday, February 12, 2010

    Sesame Sticks

    I LOVE sesame sticks.  They are so expensive though, and not as easy to find here as I'd like them to be.  I can get them in bulk at Whole Foods, but it's a 20 minute drive to get there (and they are still expensive!)

    I found this recipe online at RedChiles (a really cool food blog!) and tried it this past weekend.
    They are great!
    So EASY and CHEAP to make!
    I doubled the recipe, and didn't have the chili pepper powder to add.   Plus added a few things which I'll list on my recipe below.  (My recipe also reflects the doubling and extra stuff...)
    Next batch I make I'm not going to put as much garlic powder either, they were SOOO garlicky (and this coming from a major garlic lover!) I guess you can add any flavorings you prefer, or cheese...


    Sesame Sticks
    Ingredients:
    • 1 cup Oats
    • 2 cups all purpose flour*
    *I used about 1 cup of flour and 1/2 cup of baby rice cereal plus 1/2 cup of wheat germ)

    • 8 Tbsp Butter
    • 1/2 cup Sesame seeds (I think I added a bit more for fun)
    • 4 tsp garlic powder  (Next time I'll only use 1 or 2)
    • 2 tsp sugar  (I might leave this out too, just because I'm trying to watch sugars)
    • Salt per taste
    • 1 tsp Baking Powder
    • 1 cup water
    Method:
    • Preheat the oven to 325 F.
    • Coarsely powder the oats (I used a small food processor,)  then take a bowl and add the rest of the dry ingredients including sesame seeds and mix well.
    • Melt the butter and add to the above mixture. This will form a bread crumb like consistency.
    • Add water little by little and knead to stiff dough. Keep it aside for 30 minutes.
    • Divide the dough into smaller portions.
    • Then take small balls of dough and place it in between 2 greased waxed-paper sheets. Apply pressure and make it into flat disc. Remove the top cover and with the tip of your hands flatten the dough and make it as flat as possible. (I used a rolling pin.)
    • Using a knife or pastry cutter to cut into small strips. Repeat this process with the remaining dough as well.
    • Place the strips on a greased cookie sheet. Bake for about 10-15 minutes until they are light brown.
    • Turn them over and bake for another 10-15 minutes. Allow to cool before snacking!
     Yields: 80 sticks

    Monday, February 1, 2010

    Natural Deodorant Recipe

    I just found this recipe for Natural Deodorant on this site
    I am so excited to try it as I know it will save bundles and I will know what's in it!

    You use your own empty stick deodorant containers (washed out.)  I found a site once where you can order these new, but can't find it now.  If you know of it please let me know!

    Natural Deodorant

    1/4 cup corn starch
    1/4 cup baking soda
    10 drops essential oil(they recommend tea tree or lavender)
    Mix it all together(takes about 2 seconds)
    you can use it just like that-dust it on as a powder
    OR if you want to put it in a stick form you add
    2-3 tbs coconut oil
    you find it in the baking aisle by the shortening (also good as a skin cream and lip balm)
    Once you have it all mixed up you pack it into an old, empty stick deoderant container.
    Let "cure" about 24 hours for it to hold together properly when you apply it.

    *Another recipe is HERE.  (They say to use 1 part baking soda to 6 parts corn starch.)

    Sunday, January 31, 2010

    Cocoa & Cinnamon Rolls

    Hot Cocoa Recipe

    1. Take a small saucepan and cover the bottom with turbinado sugar (you can use regular but I just like the taste of raw sugar.) 
    2. Add about 2-3 Tablespoons of cocoa.  (I use Penzey's High Fat Content Natural Cocoa.)  If you use Hershey's or such you'll need to add a Tablespoon or so more and also add a Tablespoon or two of butter.   Also put in cinnamon if you'd like (I sprinkle a bit of Penzey's Korinjite Cinnamon.)
    3. Stir the cocoa and sugar and water to cover, about a 1/2 a cup or so.  
    4. Bring to a boil over medium high heat and immediately pour in milk to fill up pan (about 4 cups.)
    5. Add about 2 teaspoons of vanilla and heat til warm and stir with a whisk occasionally.  
    6. Serve with whatever you like- a dollop of whipped cream, sprinkle of cinnamon, marshmallows, (shot of Bailey's or Kahlua for you stressed out folks!)
    FY.I.
    There are so many different hot cocoa recipes and variations. 
    If you use shaved or chopped up chocolate instead of cocoa it's then called "hot chocolate!"  Also good but I like the way the cocoa totally dissolves myself.
    Did you know that "real" hot cocoa originated with the Aztecs?  Some say it actually had chicken broth, wine, and hot peppers in it!  I made it once to see what it was like and it was good, but different.
    The Kuna indians in Panama drink 5 or more cups of hot cocoa a day!  (They make it from fresh cocoa beans though...) 
    Cocoa 
    (There are small beans inside covered with a yummy white fruit- we used to love to get these as kids in Panama!)


    I made these delicious cinnamon rolls this morning that my mom gave me the recipe for.  So yummy!
    Served with hot cocoa, just about perfect on a cold day!


    Monday, January 25, 2010

    Natural Cleaning Recipes!

    Tub Scrub (I love this!)

    In a mixing bowl pour about equal amounts of baking soda and borax. 
    (Maybe 2 cups each?)
    Pour in some True Lemon powder (you can use True Orange or Lime also!)
    just enough to scent the mix. 

    To use:  Wet bathtub or sink.  Sprinkle tub scrub in tub.  Watch the fun!  It bubbles when it gets wet!
    Scrub and watch the sparkles!  This smells yummy too. 


    Glass & General Purpose Cleaner

    Both of these are subjective recipes too.  (Sorry!)
    I have some spray bottles I bought at Sam's Club in a three pack. 
    I fill one up about two inches with vinegar (disinfectant,) then add about an inch of rubbing alcohol (disinfectant and makes it dry faster,)  then add a few drops of tea tree oil  and fill the rest to the line with water.  To make it more of a general cleaner I add a tablespoon of Borax and let dissolve (makes icky stuff come off counters better.)  To be just a glass cleaner you can actually use all vinegar, but I like the mix of the alcohol and vinegar- just think it works better. 
    This works great on almost every surface (except nice wood.) 


    Hope you like these as much as I do!  If you have some good ones to share please comment! 

    Thursday, January 21, 2010

    Playdough Recipe

    This is a great recipe for playdough!

    4 cups of flour
    1 cup salt
    4 cups water
    4 Tablespoons oil
    1/2 cup of cream of tartar (I get my from Penzey's.com- much cheaper!)

    Mix all ingredients in a saucepan and cook over low/med. heat until dough is completely
    formed and no longer sticky. Allow to cool a bit before putting in a bag or tight container to store.

    *You can add food coloring, kool-aid (for smell and color,) I usually put True Lemon in it to give it a nice scent. This recipe lasts a LONG time (as long as your kids put it away!)

    Tuesday, January 12, 2010

    Panamanian Tamales!

    I love, love, love, Panamanian Tamales. In Panama I don't remember having them often, mainly at Christmastime at friends homes. Now I know it's because in Panama most people make them from scratch, cooking and grinding the green corn.

    I love to make them at Christmas or New Year's Eve. I freeze the leftover turkey and use that instead of chicken or pork for the filling and it is always good. This year I didn't get around to making them until this week, and that was with my sweet hubby prodding me to do them.
    "Did you buy Masa yet?"
    "What can I do to help?"
    Guess he really wanted those tamales too.

    I sort of follow this recipe from the Cooking Diva (Chef Melissa DeLeon's) website.
    I never follow any recipe to the letter though, so here's sort of what I do:

    Panamanian Tamales
    Find some banana, bijao, or platanillo leaves. (NOT easy in Arkansas.) We can get them only at Christmastime at our local Mexican grocery store, but they aren't usually very fresh and I have to really clean and pick through them. Not to mention they are expensive. This is a major factor in good tamales though so without them I wouldn't attempt it. Gives it that special flavor!
    *Note- I found out the "banana" tree I planted in my yard this year was a platanillo from a Mexican friend of mine. I let the frost kill it without harvesting the leaves, but next year I'll save some and make them right before the frost!

    Masa part:
    I don't do the grinding the green corn to make my own masa. Sorry. I am not a purist with this and just buy Masa from the grocery store. There are no directions on the bag, and Chef Melissa IS a purist and grinds her own corn, so I've made this part up over the years and it works really well.
    1. Fill your Kitchenaid bowl up pretty full with Masa (depends on how many tamales you're making.)
    2. Take at least one stick of butter (I used two- I like butter) and chop it up and using a fork or pastry cutter, cut it into the masa. Then I add about four tablespoons more or less of coconut oil (it's like shortening but better) or lard if you do that.
    3. Heat to boiling or almost boiling some vegetable broth or bouillon and add it to the mess in the bowl. Mix on low (because it will splash on you!) Add until the mixture is the consistency of playdough. Very soft but not sticky.
    4. I also add to this one small bag of cooked corn. Adds the sweetness.
    5. Then add 2 packets of Goya's Sazon, and salt and pepper to taste. If you can get culantro (not cilantro) add some here. We can't get it in Arkansas so I didn't use it.
    6. Mix, you will probably want to mix with your hands to make sure all lumps are encorporated.

    Filling:


    I use leftover turkey but you can use chicken, pork, or veggies also...
    1 medium onion chopped finely
    1 green pepper chopped finely
    1 clove of garlic, minced
    1 can of Muir Glen chopped tomatoes
    3-4 Tablespoons of tomato paste
    1-2 culantro (NOT cilantro) leaves if you have them chopped *I can't get them so don't do this.
    but I do add a packet of Goya Sazon and 2-3 Tablespoons of Goya's Recaito, which seems to give it that flavor.
    capers (I love capers)
    1 can of tomato sauce or some tomato paste with water if you want (or you can just add broth here)
    green olives (chopped or not, your preference)
    handful of golden raisins or chopped prunes (if you want-very Spanish flavor if you do)
    salt and pepper to taste
    1. Saute all of the above in a skillet with some olive oil until it looks yummy.
    2. Taste and add what you think it needs!

    Construction:
    Normally I struggle with wrapping these myself using old leaves which are fragile. My wonderful hubby helped this time and proved to be a better tamale maker than myself. Think he'll get the job from now on!
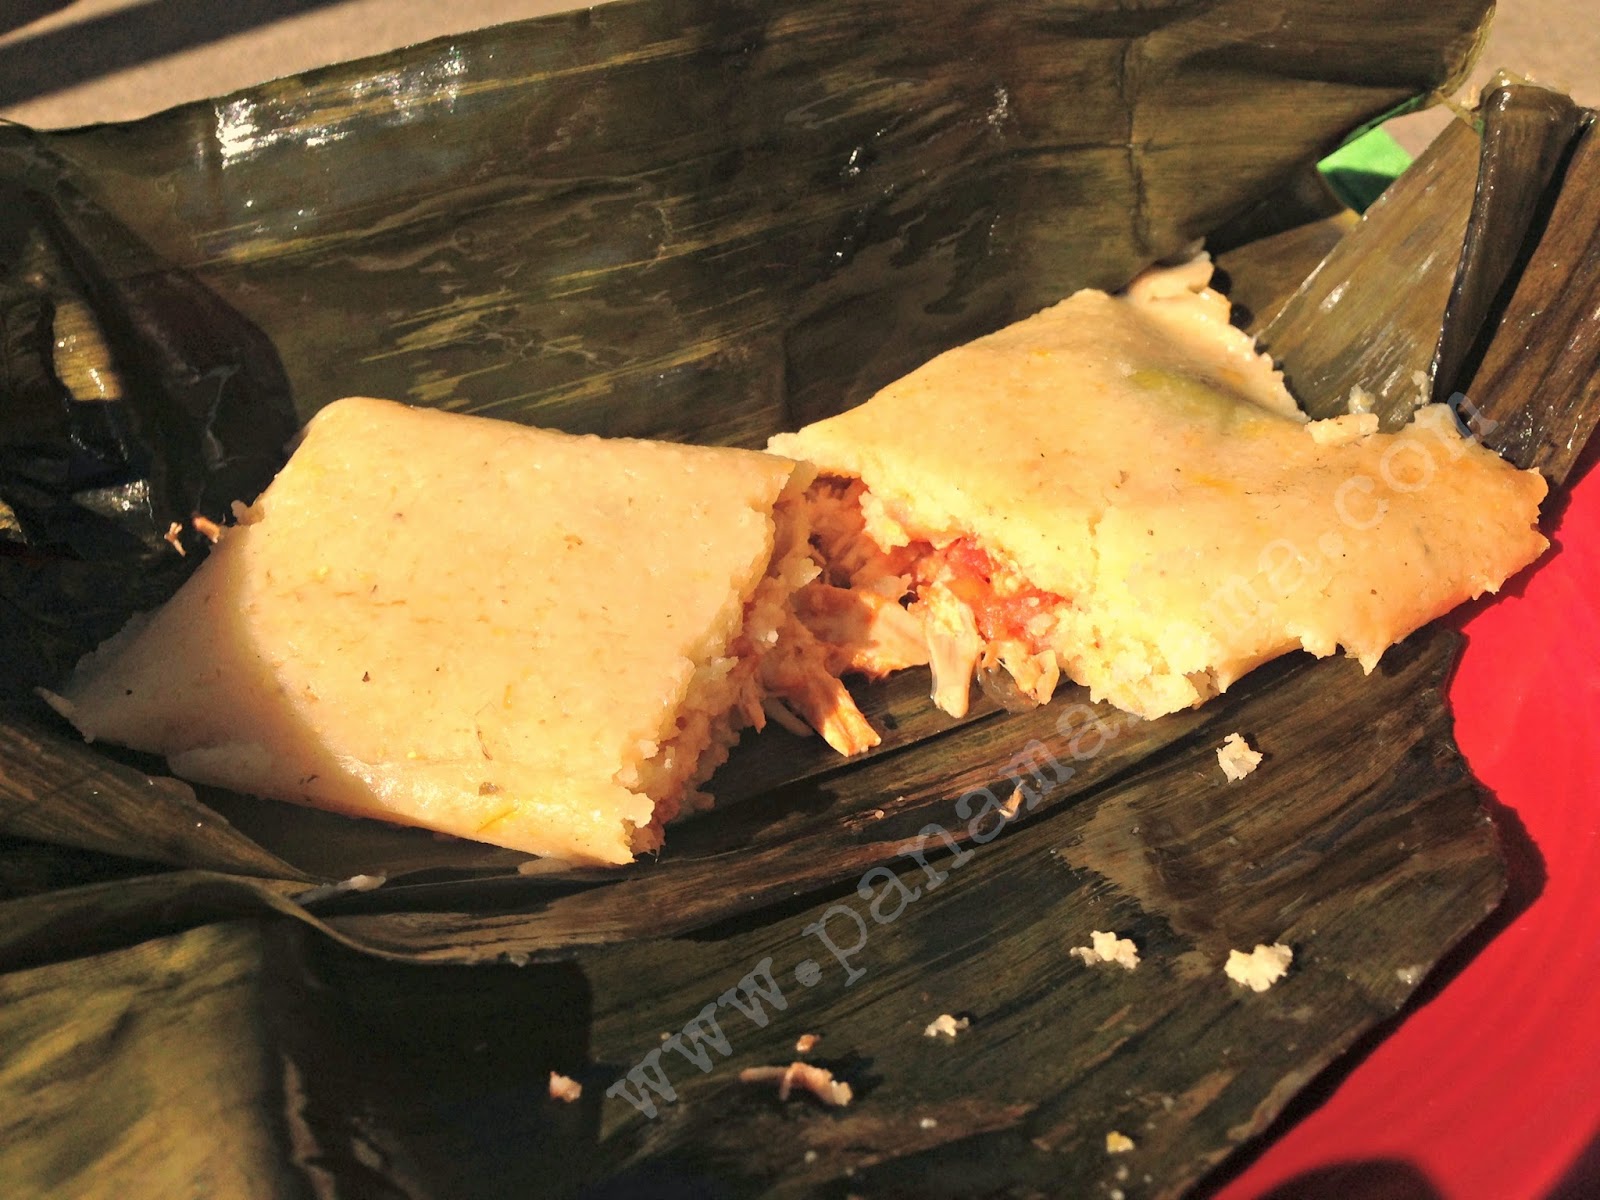
    1. Take a banana leaf (about a foot for a large tamale) and lay it flat on your work surface.
    2. Put a large dollop of the corn mixture in the mid-center of the leaf. Flatten this out to about the size of a slice of bread or bigger.
    3. Put a generous cooking spoon full of the meat filling in a line down the center of the corn mixture.
    4. Roll the leaf up gently. You'll have to roll one side up a bit, then fold in the ends and keep rolling up. (Like a burrito) Then tie with twine or string.
    5. Place these in a large pot (I use my canning pot with the jar rack covered with banana leaves) and cover the bottom with hot salted water. 
    6. Steam for one hour!
    *Leftovers freeze very well. You can wrap in waxed paper and then put in a baggie or wrap with aluminum foil and just microwave one when you want one!

    Monday, January 4, 2010

    Cake!

    This is what I came up with for that topsy turvy Alice in Wonderland like cake:


    LinkWithin

    Blog Widget by LinkWithin